“PHP Email Queue Class (PHPEQ)” Documentation by “Övünç Tükenmez” v1.0.0
“PHP Email Queue Class (PHPEQ)”
Created: 30.04.2015
Last Update: 30.04.2015
By: Ovunc Tukenmez
Email: ovunct@live.com
Thank you for purchasing this PHP class. If you have any questions that are beyond the scope of this help file, please feel free to email via my user page contact form here or just send me an email. Thanks!
Table of Contents
1. Class - top
1.1. Class Info - top
PHP Email Queue Class (PHPEQ) is a PHP class that is used to create and manage email queue using MYSQL database.
Instead of directly sending emails on the transactions, it is possible to insert email message to database using this class.
1.2. Used Technologies - top
The following technologies and libraries are used in the PHPMLC:
- PHP 5
- MySQL 5
1.3. Change Log - top
v1.0.0
- first release.
2. Installation - top
2.1. Requirements - top
PHPMLC requires the following software in order to run:
- PHP version 5.2 and above
- MySQL version 5 and above
2.2. Installation Process - top
Folder Structure:
The folder structure of the "EmailQueue" folder is as follows:
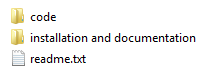
Navigate "code" folder and you will see "PHPEQ" folder, "cron_example.php" and "example.php"
If you look the source code of the "example.php",
you can understand that the php email queue class exists in the "PHPEQ/class" folder.
To see an example of how to add email message to email queue, please check "example.php".
To see an example of how to get email message from the email queue, send email and remove the message from the queue, please check "cron_example.php".
Setting up the Database:
First create new database in your MySQL server. (You can give it the name "email_queue").
Note: If you are on shared host, generally you create database using hosting provider's admin panel.
If you have create database rights, you can also use phpMyAdmin.
Once you have created database, you are ready to create tables.
To create tables, please find "database.txt" file within "installation and documentation" folder.

Copy all its contents and execute it using phpMyAdmin panel.
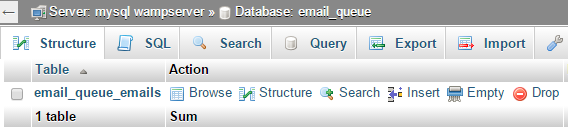
After the execution, table list should like the following: (for the version 1.0.0)
Setting up Configuration:
After you create database and create database tables, you need to configure your database access settings.
Open "config-emailqueue.php" within "code/PHPEQ/class" folder.
Its contents should look like the following:

Change the values according to your settings.
$conn_host: database host url (generally "localhost")
$conn_database: database name (if you followed this documentation, will be "email_queue")
$conn_user: database user name
$conn_password: database user password
3. Class Usage - top
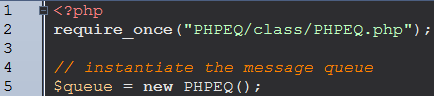
⇒ Adding class file:

⇒ Initializing class:
⇒ "addMessage()" method:
It is used to add message to queue.
⇒ "getEmailCount()" method:
It is used to get email count in the queue.
⇒ "getEmails()" method:
It is used to get an array of PHPEQMessage objects.
⇒ Other methods:
All methods of the class are commented.
⇒ Initializing "PHPEQMessage" object:

⇒ Class methods:
All methods of the class are commented.
4. Setting up Cron Job - top
To process email queue automatically, you should create a script like "cron_example.php", and setup a cron job to execute it.
If you need help setting a cronjob, please contact your web hosting provider.
You can also use third party cronjob service ike https://www.setcronjob.com.
If you will be using this service for the first time, starting with a free plan will be enough for you.
Once again, thank you so much for purchasing PHP Email Queue Class (PHPEQ). As I said at the beginning, I'd be glad to help you if you have any questions relating to this PHP class. No guarantees, but I'll do my best to assist. For any kind of bug reports, feedback, feature requests, or even if you just want to say hello, feel free to email me. I'll be really happy about it.
Ovunc Tukenmez